In the last couple of weeks, we’ve given you a deeper look into the world of user acceptance testing execution in UAT. And over this period, we have received many questions on how a User Acceptance Testing process flow works.
It’s a pretty special topic for us, too, since various people and companies use our bug tracking & testing software, helping them in their User Acceptance Testing efforts.
I want to show you the User Acceptance Testing workflow in today’s blog post. From planning to executing and analyzing your UAT efforts + you will learn UAT best practices at the end of this article.
Let’s go ahead and get started.
How does the User Acceptance Testing Process and UAT Strategy Work?
User Acceptance Testing is not like shooting in the blind when conducting user acceptance testing.
There is a strategic UAT process flow that validates if all of the business objectives and requirements are met by the product developed.
Building an Effective UAT Strategy
Your UAT strategy serves as the backbone of the testing process, guiding you through selecting the right test cases, defining success criteria, and involving the right stakeholders. A comprehensive UAT strategy not only helps in identifying potential issues early but also ensures that these issues are addressed before the product reaches the market. This proactive approach reduces the risk of costly post-launch problems and enhances the overall user experience.
Your UAT strategy, along with the UAT testing process, enables you to determine whether your product is market-ready. That’s why it is important to learn how to conduct user acceptance testing with the right tool.
UAT planning also verifies whether change requirements are deployed to align with the business needs.
There may be a few other business requirements for changes that might not have been relayed to the development department and that’s where your UAT test strategy comes into action.
That’s where having a User Acceptance Testing checklist template can help out.
Apart from that, UAT testing helps you minimize post-release risks as the cost of fixing issues prior to the release is far lower than fixing them post-release. The UAT process is what protects an organization’s reputation in the market.
Now, it’s time to get your hands dirty. I’ll guide you through the 5 steps of a UAT process:
- Planning
- Execution
- Documentation
- Evaluation
- Reporting & Lessons Learned
5 UAT steps to your workflow
User Acceptance Testing is complicated. That’s what a lot of you think.
From creating a UAT plan to executing and analyzing your test cases. All kinds of different departments and people are involved.
And worst of all… UAT takes place at an awkward time: at the end of a project.
Your development team is done with their tasks (at least they should be), and your QA agents start testing the application.
And they have just one main job: test if the application works for your users.
1. Planning
Planning your User Acceptance Testing efforts is an absolute must-have.
Without proper planning, UAT won’t get you anywhere. Planning your User Acceptance Tests must cover the following areas:
Planning & Time Management
In the first step, you need to clarify some basic questions. You need to collect information regarding your UAT schedule and your QA agents and testers. Please make sure all the information is in one place to set up a realistic UAT plan.
And most importantly, Draft a concept of what your testing groups should look like.
Staff Requirements
You need to plan who of your team is involved in the next UAT execution. UAT execution, as well as ensuring that all responsibilities and tasks are known.
Every person involved in the UAT process should have a clear understanding of what his or her responsibility is.
When setting up beta testing with your UAT team ensure to bring everyone on the same page. Establish clear communication guidelines and prepare your target audience for the test case.
Communication & Issue Strategy
While executing the defined UAT test cases you need to make sure to have a User Acceptance Testing workflow in place that deals with bugs, issues, and other problems.
- How are you going to document problems?
- How can testers communicate problems?
This is exactly where visual feedback for UAT makes a real difference, testers can show what went wrong without having to write up a lengthy bug report every single time.
UAT Checklist for downloading (in pdf)
Before starting to execute test cases, I recommend making use of a User Acceptance Testing checklist. It will help you to stay focused and keep your efforts and to-dos in place.
Based on our UAT experience, we’ve put together this User Acceptance Testing workflow checklist template for you. You can download and view the checklist for free. If you’re looking for a head start, our UAT testing template makes it easy to organize test cases, set clear acceptance criteria, and keep sign-offs on track, all in one place.
2. Execution
You have a couple of options when executing your UAT test cases. As the name suggests, your testers (= potential users) will now test and evaluate your application regarding certain test scenarios.
If you provide a global product in various geographical markets, chances are high that you can’t meet these testers in person.
The test cases can be executed in one-on-one sessions via Zoom or any other video calling software.
During the sessions, you will gain a lot of quantitative and – even more important – qualitative data from your actual users themselves.
Especially if the test cases are executed after the finished development process, you might end up with some new insights that you haven’t considered. Your theory of how much know-how your real users will have will be tested.
3. Documentation
Executing and documenting your User Acceptance tests should happen simultaneously. I recommend setting up a system that allows you to document all relevant information without losing any test data.
Documentation is one thing, clearly defined responsibilities for ensuring the implementation of your users’ feedback is another key factor.
A lot of our customers have set up Usersnap for this step. Bugs, feedback, and other abnormalities can be documented on your user’s browser screen with a website feedback widget. An easy-to-use project dashboard allows your colleagues to get a good overview of important issues. Making sure to delegate and assign priorities is another key thing here.
4. Evaluation
During this phase, you must evaluate if the defined acceptance criteria are tested and met. And most importantly if those criteria were successfully accomplished by your testers.
Has any test case failed? Which problems did occur? How can those problems be resolved and who is responsible for that?
The quantitative and qualitative data documented in the first place need to be analyzed. The following questions need to be answered:
- How many testers complete the test cases?
- What was the overall rating of these test cases?
- What was the overall state of mind of each tester?
- Which emotions did occur during the test cases?
The evaluation phase is a pretty extensive one, since each and every single test case needs to be analyzed and put into context.
5. Reporting & lessons learned
You might think that the evaluation and reporting phases are the same. They are not. During the evaluation phase, you are collecting, aggregating, and analyzing data.
In contrast, the reporting phase deals with the bigger picture.
The main goal is to gather insights and lessons learned which will help you to improve your future test cases and UAT workflows.
You might also start building relationships with some of your UAT testers during that phase as they are a helpful source for further feedback and insights.
User Acceptance Testing best practices
The ultimate goal of user acceptance testing is to ensure the software works as the users expected or intended.
However, the secondary goal, which is so important that often in practice this becomes the primary goal, is to make the UAT process flow as efficiently as possible. Time-wise and cost-wise.
How to conduct user acceptance testing with good project management over timelines and resources, here are some best practices for your UAT testing strategy:
- Prepare a UAT plan early on in your project
- Define the scope and set expectations in a clear and concise manner
- Develop a checklist of conditions and prerequisites prior to starting UAT
- Align with stakeholders on the process and UAT tracker tools
- Conduct usability testing with real-world end-users and not just the client
- Hold a debrief feedback meeting prior to proceeding to production
The most important stakeholders in the UAT planning are the product owner, UX designer, lead engineer, QA engineer, and the client.
However, running the UAT will be the task of the QA testing team, who may also be leading many other tests.
To ensure the various web application testing processes do not interfere with each other, here are some best practices for the QA engineering team in UAT planning:
- Set clear lines between system tests and user acceptance tests
- UAT test plan should evaluate end-to-end business flow
- Carry out a pre-UAT session when you are in the system testing phase
- Test your product, system, or app using real-world user roles and scenarios
- Educate testers on the tools to perform and document test results
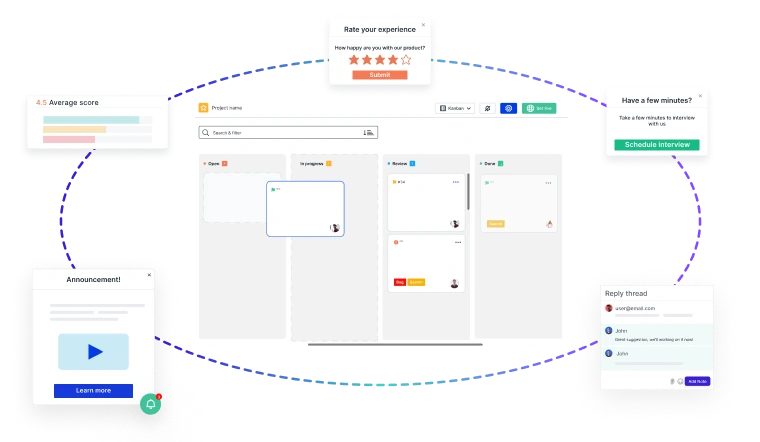
For both stakeholders and testers, it’s best practice to show UAT examples of what the UAT process would look like.
Let us demonstrate this right now by showing you a screenshot of what UAT test results look like in Usersnap’s list dashboard.
A User Acceptance Testing (UAT) tracker tool is a vital software development tool specifically designed to monitor and manage the UAT phase.
It serves as a centralized platform for recording, tracking, and prioritizing test cases, issues, and feedback submitted by testers and end-users. The UAT tracker provides visibility into the progress of testing, ensuring that test cases are executed systematically and issues are documented, assigned, and resolved efficiently.
It facilitates clear communication between testing teams and development teams, enabling them to collaborate seamlessly, ultimately leading to the successful identification and resolution of defect, and ensuring that the software aligns with user expectations before deployment.
The primary reason behind conducting alpha testing a user acceptance test (UAT) is to demonstrate that the project complies with its goals and objectives.
If you want to learn how to perform user acceptance testing, keep in mind that it’s not an exercise to find bugs and errors in the code.
That’s UAT for dummies 101.
Now let’s take a look at different UAT phases that explain how should user acceptance testing be performed.
Engage users/customers to define test criteria
Ensure that you and the end user understand each other when it comes to the scope and expectations of UAT.
For this exercise, you will need to define scenarios and acceptance conditions.
Apart from that, you will also need a test environment which can be a remote or in-house location.
Moreover, you will define test procedures to assess and evaluate the conditions.
Communicate Any Shortcomings/Bottlenecks
Once you run the user acceptance test, you will learn which conditions are being met and which aren’t. Some bugs and weaknesses may also come to light. This will allow you to prepare a mitigation plan and tell your users when the reported issues will be fixed.
Continue User Acceptance Testing
As the conditions are being met and issues are being fixed, allow the users to test the system according to your predetermined strategy. Keep your user acceptance testing plan going until you’ve ironed out all the kinks and issues.
Ask users to sign Off
After you have conducted UAT, have customers or users sign off on UAT. This will indicate user acceptance testing project and completion of your project milestone.
UAT environment setup
To ensure that required standards, policies, and regulations are met, you can design a UAT environment that allows developers working on a project to test new features and functionality. Administrators can be permitted to connect to the UAT environment setup each time there are features that need to be tested. This ensures that the whole process of UAT functional testing is standardized.
Speak Human. Feedback is for human beings, so address them as such. Use the words your users use.
User acceptance test it’s not just a test. It’s a cycle.
By solving our own most difficult problems, we’re potentially creating immense value for everyone else.
User Acceptance Tests are regularly conducted at the end of a software development phase, at a time when the product is nearly “finished”. This must not be the case. The later problems occur, the more expensive they are.
UAT workflows can be implemented way earlier. When pursuing a more agile approach to UAT, UAT itself is not a separate project step. Instead, it requires continuous collaboration between all team members and stakeholders.
Throughout the entire development workflow, UAT becomes an essential part of every project stage.
The goal here is to integrate User Acceptance Tests in each and every project step. UAT is not a phase anymore. Ensuring continuous progress means ensuring continuous test and feedback cycles.
When selecting a tool to help make communication, bug reporting, issue tracking, and team collaboration easier, you can turn to Usersnap the visual feedback software for UAT
Click, screenshot, or screen record, annotate on the issue and send. Yes, it’s as easy as that! Usersnap allows you to collect test feedback within your app, users can draw and comment directly which makes it quick and accurate. Browser info, screen size, URL, and Javascript errors are automatically captured with each ticket so your engineers can reproduce and troubleshoot on the spot.
We have 100% faith that user feedback will help companies strive, therefore we allow you to try out Usersnap for free, for real – no credit card, no time limit, no gated features. Once you have experienced the power of collecting and acting on user feedback, we then prompt you to select a paid plan.
Close the Feedback Loop with Actionable Insights
Building great products starts with customer feedback at every stage of your
Product Development Lifecycle (PDLC)
- 🚀 Capture insights effortlessly—from feature discovery to post-launch improvements.
- 📊 Turn feedback into decisions—prioritize requests, track issues, and refine the user experience.
- 🔄 Iterate faster—validate ideas, reduce friction, and keep customers engaged.
Usersnap helps you collect, manage, and act on feedback—seamlessly.
Sign up today or
book a demo with our feedback specialists.