Mistakes are inevitable. We’re only human, after all. But when it comes to delivering software or websites to our clients, we want to make that happen with as few errors as possible. It sounds like a great goal, but how do you systematically achieve it?
The key to minimizing errors is to design a quality assurance workflow that is efficient and reliable. In this article, I discuss exactly how to do that, whether your company is big or small or a one (wo)man show.
Our initial Quality Assurance Workflow in just 4 Steps
For a small/medium sized web development agency, we wanted to keep the QA workflow simple. Every step should be designed with that simple point in mind, that we are in fact only human. Even the most detail-oriented person will be more effective with a clear and consistent system than relying on their skill alone.
I’ve identified the 4 steps of how we set up our quality assurance workflow. It works well for us so it might be the same for you too.
The Right Person for the Job
The first challenge in establishing a proper QA routine is picking who will perform the quality assurance reviews. If mistakes were easy to notice in our own work, we would just fix them ourselves. Since that’s not easy to do, it’s best to have a pair of fresh eyes checking the project.
If your company has enough capacity, the best option is to hire a QA specialist. Naturally, they won’t have the problem of being so involved in the project that they overlook issue reports. Moreover, a specialist will typically become faster and better at their task than someone who just reviews for errors occasionally.
But if you’re a small agency, hiring a QA specialist is not always possible. Our own company only created the role in the past year, as we transitioned from two dozen to over 50 employees. You can still keep the principle of “fresh eyes” in a smaller organization by having developers or team leaders check other developers’ work.
What about if you are freelancing? In this case, the most effective solution is to build in a couple of days into your timeline that you can put a project aside before a review. Work on something else for a little while. Then, when you come back, you will have a more objective eye for the work.
Writing a QA Checklist
Checklists save lives, literally. Hospitals and airlines are examples of areas where checklists have proved absolutely indispensable.
Obviously, the stakes are not life or death when it comes to websites. But the principle is still the same: checklists work because humans are not good at remembering a long list of tasks with 100% accuracy.
How you write your checklist depends on what kind of work you do. If your projects are relatively standardized, like building websites, it will be useful to make a QA checklist template. This template should cover the elements that should be tested or reviewed for correctness for every project.
The more specific and concrete the checklists are, the better. In our case, our QA specialists focus on both visual and functional accuracy. To give an example of how concrete a checklist should be, our checklist for functionality includes the following points:
- A logo should be linked to the Home page (Check behaviour when you hover over the link)
- All external links should have target=”_blank”
- Click all elements on the site (all buttons, all forms) and make sure that all clickable elements have the correct behaviour
- For any form:
- Try to send an empty form and make sure that text of errors is readable and have the same style as other pages on the site
- Make sure proper recipient is emailed, the FROM address and SUBJECT lines are correct per directions and the user is brought to a confirmation page (Thank you page) if applicable
- Check search functionality and formatting of search results
If you work on software development, most projects may have common elements but also some aspects that are unique to each one. You can still start with a UAT testing template as your baseline, then write up additional items to check based on the project’s unique requirements before development begins.
Setting Up the Workflow
Now you have the basic ingredients: your quality assurance reviewer and a checklist of issues to look out for. How you put them together and build your quality assurance workflow is key.
Whatever tools or system you decide to use, it needs to fulfil two features:
- Centralizing the checklists and additional tasks to be done so they are visible in one place. See again: humans being bad at remembering long lists of tasks.
- Distinguishing who has responsibility for moving the project to the next stage. This keeps the project on track when everyone is juggling multiple projects at once.
We use Trello in combination with Usersnap to do this. We start with a template in Trello, where lists indicate who is in charge of a particular stage of the workflow.
We use one board for the internal QA process, which only involves the developer and the QA specialist.
We use a second board to process the external feedback from the client. This board incorporates the account manager and the client themselves in addition to the QA specialist and developer.
The templates also have standardized checklists built-in for all participants as needed. This setup can easily be adapted given the individuals you choose to include as part of your process.
As the QA specialist goes through their list, they add cards as needed to the developer’s list to indicate issues to be addressed. The Trello integration with Usersnap makes this process even simpler by directly adding cards to Trello when the reviewer gives feedback including visual feedback for QA like annotated screenshots with browser and device information attached automatically.
Whether you use Trello or another task manager, this combination of visually tracking who should be working through their part of the process and exactly what they have done will let you scale up and still keep errors down.
Continuous Improvement
We’ve talked about how to set up a QA workflow so you can minimize errors in projects before delivering them to clients for external feedback. But what can be done to decrease the number of bugs that get to the internal QA stage, much less to the client?
Sometimes (though not always) there are patterns of issues that pop up. To identify these patterns, you need to collect metrics. This could involve assigning the QA specialist in your organization to categorize the types of issues that come up as they are identified. Such information can then be aggregated about a given developer to provide continuous feedback and testing for improvement.
There’s a big caveat about collecting comprehensive metrics like this: on a small scale, it’s often not worth it.
Collecting and organizing information for metrics is time-consuming. While it could help improve the process, the improvement may not be worth the investment of time. It usually only pays off in very large-scale processes, when a small improvement provides benefits many times over.
For example, even with several dozen employees, in our company, we are only just beginning to discuss future implementation of metrics on the feedback and QA process. Even so, our initial plans will be to give a general metric on quality, by tracking whether client feedback identifies bugs or additional “out of scope” requests, rather than giving detailed analyses of patterns of issues.
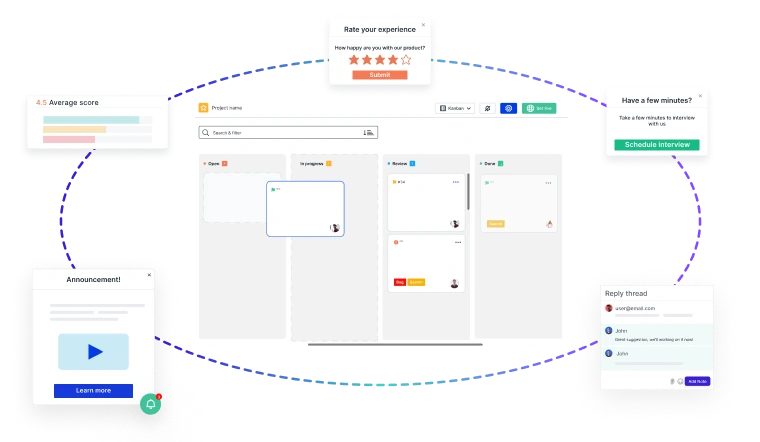
Create a workflow to turn feedback into actions
Triage and move along your incoming feedback, issues, and ideas with fully customizable status fields.
With the Kanban view, you can easily manage testing workflows and improvement pipelines. Auto 2-way sync custom statuses with Jira and Azure DevOps, so that your development sprints, stakeholder’s guest board, and feedback center are all moving in harmony!

Start planning your Quality Assurance Workflow
It’s not always possible to do everything at once when you want to improve the quality of your company’s work. By breaking it down, you can focus on tackling one step at a time to achieve improvement:
- Reviewing projects for quality with “fresh eyes”
- Writing thorough and detailed checklists
- Setting up a workflow that centralizes to-dos and distinguishes responsibilities
- Incorporating continuous improvement metrics where possible
The above are concrete steps you can take build an effective quality assurance process, which starts from recognizing how mistakes creep into the process.
What tools or systems does your team use to optimize the quality assurance process? Share your tips with us in the comments!
About the author:
Bobby King is the Chief Operations Officer of The White Label Agency. He has managed the production of 2500+ websites over the past 3 years.
About The White Label Agency:
The White Label Agency is a B2B partner helping marketing agencies, web agencies, and digital agencies build custom WordPress websites for their clients. Our partners create the designs, and we do the coding as their invisible back office.
Close the Feedback Loop with Actionable Insights
Building great products starts with customer feedback at every stage of your
Product Development Lifecycle (PDLC)
- 🚀 Capture insights effortlessly—from feature discovery to post-launch improvements.
- 📊 Turn feedback into decisions—prioritize requests, track issues, and refine the user experience.
- 🔄 Iterate faster—validate ideas, reduce friction, and keep customers engaged.
Usersnap helps you collect, manage, and act on feedback—seamlessly.
Sign up today or
book a demo with our feedback specialists.