Browser extensions in general and chrome extensions, in particular, are small “software programs that customize the browsing experience”.
If you’re thinking about building your own Chrome extension, we provide you with helpful resources and tips in this article.
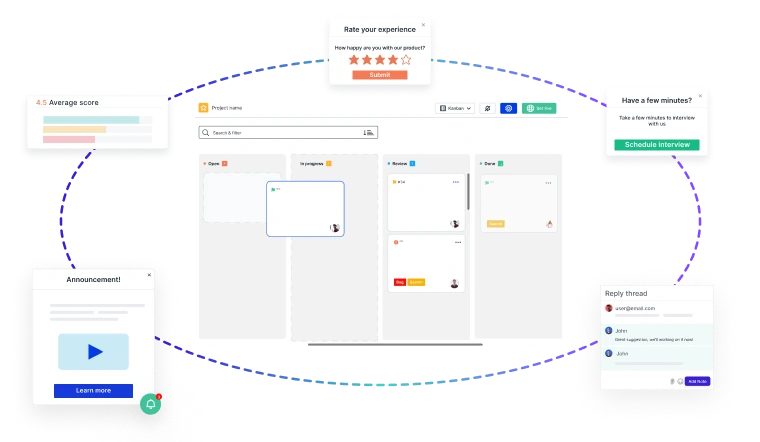
Our very own Usersnap Chrome extension is used by thousands of people, and we are happy to share our knowledge on how we built (and maintain) our extension with you.
Why build a Chrome extension?
The short answer: Because Chrome is the most popular browsing software in the world. According to W3Counter, Google’s Chrome had a market share of 58,8% in December 2017, making it the most popular internet browser.
 (source: www.w3counter.com)
When looking at the global search trends, it’s even more obvious why you might consider a Google extension as a great way to distribute your software:
While Google is still the most popular browsing software, it enables developers from all sorts of industries to distribute their solutions to people.
What are the prerequisites to building a Chrome extension?
A Chrome extension is essentially a web page.
If you are familiar with common web technologies – such as HTML, CSS, JavaScript – you are able to build an extension as well.
Your Chrome extension can use all the APIs that a browser provides (such as JSON, or XMLHttpRequest). It can interact with any web page or server using content scripts or cross-origin XHR. Extensions can also interact with browser features, such as browser tabs.
However, building a Chrome extension is not only a matter of technical knowledge but requires meeting Google’s quality standards. Similar to iOS design and quality guidelines, a Chrome extension must meet the “Extension Quality Guidelines”.
Chrome Extension Quality Guidelines
The Developer Program Policies from Google provide a comprehensive list of standards and policies. These policies help you build your first extension for Chrome.
One of the key quality factors is the so-called single purpose.
An extension must fulfill a single purpose that is narrowly defined and easy to understand. A single extension can include multiple components and a range of functionality, as long as everything contributes towards a common purpose.
Google emphasizes that your Chrome extension must provide a single purpose for a particular use case, in order to avoid bad browser performance or a “crowded browser UI”.
I’d recommend you to read the Extension Quality Guidelines in detail, but here is a summary of the most important criteria:
- Avoid unexpected changes to browser functionality and settings
- Permissions: Google assumes that your extension utilizes each of the permissions it requests. Excessive permissions unrelated to your extension’s purpose will result in a policy violation.
Chrome Extension UI Guidelines
From a technical standpoint building a Chrome extension is like building web pages. From a user experience and user interface perspective, however, it’s a bit different.
As extensions have different purposes and use cases, we must differentiate between different UIs.
Many extensions add a UI to people’s Chrome browsers through “browser actions” or “page actions”. One particular Chrome extension can only have one browser action or one page action.
So what is exactly a “browser action” or a “page action”?
Browser actions:
If you want to develop a Chrome extension which is relevant for most websites or web apps, you should choose a “browser action”.
Page actions:
If you build an extension which is only relevant for a few web pages (like gmail.com), you would choose “page actions”.
Page actions represent actions that can be taken on the current page, but that aren’t applicable to all web pages.
Extensions with page actions are grayed out (inactive) while the user is not visiting the relevant web page.
While the Usersnap extension could be used on any web page (= always active), the Tampermonkey extension is only active on specific web pages.
File structure and architecture of a Chrome extension
Extension files are zipped into a single .cry package which the user downloads and installs. Such an extension package must consist of the following files:
- A manifest file
- One or multiple HTML files
- Any other file which your extension needs (e.g. images, JavaScript file)
After you’re done developing and testing your extension, you can upload the zipped files in the Google developer dashboard.
So how do you build up your file structure?
Relative URLs vs absolute URLs
When developing your extension, you can refer to any file using a relative URL. This works just like building a simple HTML page. If you put images in a subfolder called “images” you can simply refer to those files with the following example:

That said, your files are also accessible by an absolute URL using a unique identifier. As this extension ID can change (before it’s packed) you can use the @@extension_id predefined message in order to avoid hardcoding your extension ID while developing it.
An example of an @@extension_id would be:
body {
 background-image:url('chrome-extension://__MSG_@@extension_id__/background.png');
 }
Any CSS and JavaScript file can contain this special message. It does not work in manifest files.
The Manifest File
Every single Chrome extension must have a JSON-formatted manifest file, named manifest.json.
This manifest file provides all necessary information about your Chrome extension, such as versioning, permissions, and other useful meta information. The file must be placed in the root folder of your chrome extension.
According to Google, every manifest file must contain the following information:
{
"manifest_version": "2.1",
"name": "My Extension",
"version": "versionString",
}
The following information is optional but recommended:
{
"description": "Gets information from Google.",
"icons": {
    "128": "icon_128.png" },
"background": {
    "persistent": false,
    "scripts": ["bg.js"] },
"permissions": ["http://*.google.com/", "https://*.google.com/"],
"browser_action": {
    "default_title": "",
    "default_icon": "icon_19.png",
    "default_popup": "popup.html"}
}
For further information on how to create a manifest file, I recommend checking out the documentation from Google here.
Architecture
When developing a new Chrome extension, you probably need some of the following elements for your extension to run inside the browser.
- A background page: holds the main logic
- UI pages: used to present the extension’s UI
- Content scripts: used for interacting with pages that the user loads
Let’s get into them in detail.
Background page
A background page is used to hold the main logic of your Chrome extension. This means that the background.html page consists of code that controls the behavior of your extensions.
While persistent background pages always run, event pages are only open when the extension is opened and closed (as needed by the user).
Google suggests preferring event pages unless you need your background page to run all the time.
UI pages
A Chrome extension can consist of HTML pages. Those HTML pages display the extension’s interface.
An HTML page – for example – could be used for a popup which opens after the user clicks the extension icon. This HTML page (in our case a popup.html) has access to each other’s DOMs, and it can invoke functions on each other. This means that the popup.html does not need to duplicate code which might already be used in the background.html page.
Content scripts
If you’re building a Chrome extension which needs to interact with web pages that are loaded by users, you definitely need a content script.
A content script is a JavaScript that runs in the context of the loaded page. Rather think of it as part of the loaded page.
Content scripts could change a loaded page. For example, it could replace every single image of the loaded web page with an image of Ryan Gosling (like this extension).
How to test your Chrome extension
Once you’re finished with the actual development work, you need to make sure to properly test it.
And luckily testing your new extension is pretty straight-forward. Once you’ve activated the “developer mode” of your chrome extension settings (accessible with chrome://extensions), you are good to go.
You can simply add your unpacked extension to your Chrome browser to test it. If successfully added, you should see the icon of your own extension within your browser.
To test your newly created extension you can perform any functionality and acceptance test to see if it works as intended.
Done with your Chrome extension: How about a Firefox extension?
Great news! With the latest Firefox update (called Firefox Quantum), Mozilla made quite some progress in the browser game.
Firefox Quantum is not only super-speedy but also uses the WebExtension API for their browser extensions.
Therefore, it’s rather easy to port your existing Chrome extension to Firefox. There are a few incompatibilities that need a workaround. Depending on your browser extension, this should not require a lot of work to port it to Firefox.
In order to test the compatibility of your Chrome extension, Mozilla offers you to run an extension test.
As of autumn 2017, we at Usersnap use the same source code for our very own Firefox and Chrome extension.
Wrapping it up.
Obviously, there are further functionalities and characteristics which you could utilize for your Chrome extension. But we’ve shown you the basics on and we hope you’ve found a good way to develop your own Chrome extension.
This article is brought to you by Usersnap – the #1 customer feedback platform with versatile feedback options for measuring Customer Experience, QA and UAT. It’s your central place to organize user feedback and collect bug reports. Report bugs in your browser, and see the bigger picture.
Close the Feedback Loop with Actionable Insights
Building great products starts with customer feedback at every stage of your
Product Development Lifecycle (PDLC)
- 🚀 Capture insights effortlessly—from feature discovery to post-launch improvements.
- 📊 Turn feedback into decisions—prioritize requests, track issues, and refine the user experience.
- 🔄 Iterate faster—validate ideas, reduce friction, and keep customers engaged.
Usersnap helps you collect, manage, and act on feedback—seamlessly.
Sign up today or
book a demo with our feedback specialists.